
Understanding Diamond Grit Size and Its Impact on Concrete Polishing
What Is Diamond Grit Size and How It Defines Abrasive Performance
The size of diamond grit basically means how big the actual diamond particles are in those polishing pads we use, usually measured in microns. The numbering system works kind of backwards too. Numbers like 6 to 40 actually mean bigger, rougher particles that cut through stuff fast. But when we get into the 1,500 to 3,000 range, these are super fine abrasives that work on smoothing out surfaces at a really tiny level. Contractors often start with coarse grits to strip away old coatings and flatten uneven spots in concrete floors. Then they move up through progressively finer grits until the surface looks glassy smooth under proper lighting conditions.
The Relationship Between Grit Size and Material Removal Rate
Diamond grits in the 16 to 40 range remove material about 30 percent quicker than those with medium grit sizes, as most people in the abrasive business will tell us. But there's a catch here. The faster removal rate leaves behind much deeper scratches, usually somewhere between 50 and maybe even 100 microns deep. That's a world of difference compared to higher numbered grits that barely leave any mark at all, sometimes less than 10 microns. Anyone working with these materials knows this balancing act well. Going straight for the coarse stuff just isn't smart long term. Better results come from starting rough and then gradually moving to finer grits throughout the process.
How Grit Size Affects Scratch Removal and Surface Finish
Effective concrete polishing depends on systematic grit sequencing. Starting with 40-grit pads removes surface irregularities but leaves visible scratches. Each subsequent step—such as advancing from 80 to 150 to 300 grit—eliminates 90–95% of prior scratches, as confirmed by surface profilometry studies. This incremental approach ensures a smooth transition toward optical clarity.
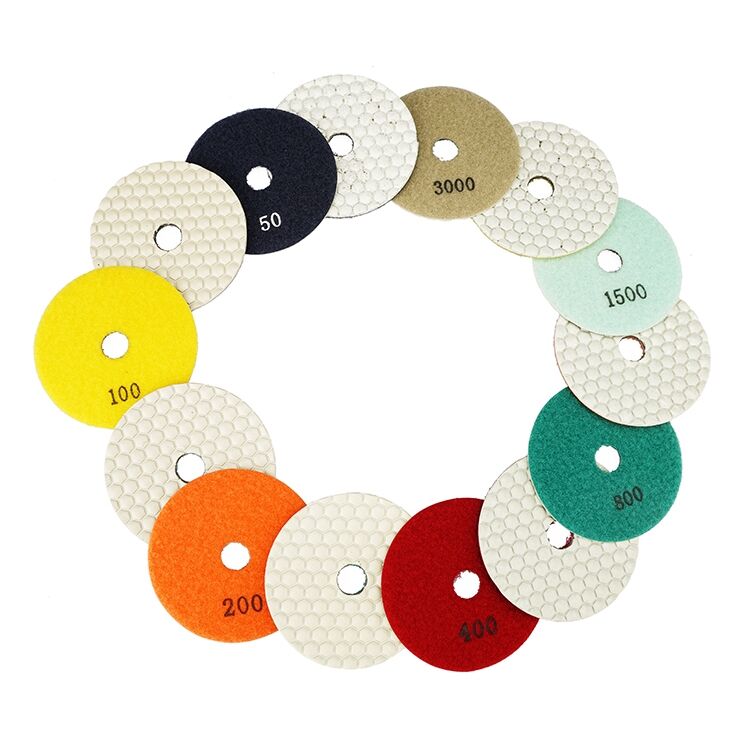
Diamond Grit Sizes for Concrete Polishing: From Coarse (6-16) to Extra Fine (3,000+)
| Grit Range | Particle Size (microns) | Primary Use Case |
|---|---|---|
| 6-16 | 1,250-1,180 | Heavy grinding/leveling |
| 30-60 | 530-250 | Scratch pattern refinement |
| 100-400 | 150-37 | Preparing for chemical hardening |
| 800-3,000+ | 20-4 | Achieving optical clarity in finishes |
This progression enables contractors to deliver polished concrete with ≤ 2 GU (gloss unit) variance across entire slabs.
The Progressive Grit Sequence in Concrete Floor Polishing
Concrete polishing diamond grit sequence and its scientific basis
The diamond grit sequence follows a scientifically grounded progression from coarse to fine abrasives, based on principles of abrasive mechanics. Each stage systematically reduces scratch depth—from over 200 microns down to less than 5—preserving structural integrity while enhancing light reflectivity and surface uniformity.
Why skipping grits compromises finish quality
Skipping grit stages forces finer pads to address deep scratches they cannot effectively remove, trapping imperfections beneath the surface. Industry tests show improperly sequenced floors develop 40% more micro-cracks and exhibit 60% lower gloss retention over five years compared to properly polished surfaces.
Typical grit progression from 30 to 3000 for high-gloss polished concrete
A standard four-stage sequence delivers optimal results:
- Coarse (30-100 grit): Levels uneven areas and removes coatings
- Medium (200-400 grit): Eliminates pitting and refines edges
- Fine (800-1500 grit): Develops preliminary sheen
- Extra fine (3000+ grit): Produces mirror-like clarity
Grit size chart for concrete polishing pads and stage-by-stage recommendations
| Grit Range | Purpose | Scratch Reduction* |
|---|---|---|
| 30-100 | Aggregate exposure | 80-90% |
| 200-400 | Scratch pattern removal | 95-97% |
| 800-1500 | Surface densification | 98% |
| 3000+ | Reflectivity enhancement | 99.5%+ |
*Based on 2023 concrete finishing industry benchmarks
To maintain efficiency, advance only 1–2 grit levels per stage (e.g., 100 → 200 → 400). This minimizes over-polishing while balancing speed and finish quality.
Matching Grit Size to Surface Condition and Preparation Needs
Determining Starting Grit Based on Floor Damage Level and Surface Condition
Choosing the right starting grit begins with looking at how bad the floor damage is across each square foot area. For floors with deep gouges over an eighth of an inch, bits of concrete coming loose, or sticky old glue left behind, most professionals reach for those rough 30 to 40 grit pads first since they cut through problems faster. When dealing with surfaces that just show moderate wear and minor imperfections no deeper than about 1/16th inch, many start with around 80 to 100 grit material. A recent look at what's happening in the flooring business shows interesting trends too. About three quarters of all contractors now grab their surface profilers or depth measuring tools before grinding starts. This approach cuts down on mistakes where people grind too much by roughly 40 percent when compared to just eyeballing things without proper measurement equipment.
Coarse, Medium, and Fine Grit Applications for Cracked, Pitted, or Uneven Slabs
| Grit Range | Primary Application | Surface Imperfection Addressed |
|---|---|---|
| 16-30 | Heavy material removal | Wide cracks (>1/4"), severe unevenness |
| 50-200 | Scratch refinement | Pitting, minor leveling issues |
| 400+ | Final polishing | Residual hazing, micro-scratches |
For repaired concrete, a sequence using 30→100→200 grit pads removes 98% of repair compound overflows while preserving substrate integrity. Monitor slurry consistency during coarse grinding—excessively dry conditions increase diamond tool wear by 29%, per abrasive technology research.
Aligning Grit Selection with Polishing Goals and Finish Requirements
Choosing Grit Size for Matte, Semi-Polished, or High-Gloss Finishes
The type of grit used plays a big role in how polished concrete looks at the end. Coarse grits ranging from around 100 to 200 give off those matte finishes that work great in factories or warehouses where people need traction more than they care about shine. When we move to medium grits between 400 and 800, we start getting these semi-polished surfaces that many stores actually prefer because they still have some gloss without being too reflective or hard to maintain. If someone wants that mirror-like finish though, going all the way from 1500 up past 3000 grit is pretty much necessary. This removes tiny surface imperfections and can get surfaces reflecting light at nearly 95%. Contractors who skip steps in this process often end up with swirl marks across their work. Industry reports show that about three out of four professionals dealing with rushed jobs encounter this problem regularly.
Achieving Optical Clarity and Reflectivity with Fine and Extra Fine Grit (100-3000)
Using finer grits actually works on the surface down at a microscopic level. As we move through the different grit sizes from around 100 up to 3000, each step manages to cut down those scratches by roughly between 60 and 80 percent. What this does is let the densifying agents get into the material more evenly across the whole surface area, which makes the concrete slab stronger overall and gives it better visual clarity too. The really tiny 3000 plus grit pads can create surfaces that look almost like mirrors because they line up these calcium silicate hydrate or C-S-H crystals so they run parallel along the top of the slab. Most professionals will tell you it takes somewhere between eight and twelve passes for each stage of polishing to achieve this alignment properly. And when everything goes right with this process, the end result reflects about four times more light than regular untreated concrete would.
Balancing Durability and Aesthetics Through Proper Diamond Pad Selection
Getting that mirror-like finish comes at a cost. The really fine 3000+ grit pads do give amazing shine but they basically close up the surface pores about 90% of the way, which means the densifiers just can't get in there properly. A better approach for many situations combines medium grade pads around 1500 to 2000 grit with those lithium silicate products. This combo actually boosts how well the surface stands up to wear and tear by roughly 35%, according to tests done under ASTM C1353 guidelines, all while keeping most of that reflective quality intact. When dealing with spaces that see lots of foot traffic or are exposed to weather conditions, going for semi-polished surfaces in the 400 to 800 grit range makes more sense. Pair these with good quality penetrating sealants and the results speak for themselves. Real world testing over 18 months showed these surfaces had about half the damage compared to their shiny counterparts, making them a smarter long term investment for busy commercial areas.
Avoiding Common Mistakes in Diamond Polishing Pad Grit Selection
Skipping Steps and Over-Polishing: Top Errors in Grit Progression
Cutting corners on grit steps might seem like a shortcut but actually wastes time in the long run. Contractors who skip from 100 to 800 grit sanding typically end up spending about 35% extra time fixing those pesky swirl marks later on, as reported by the Flooring Standards Institute back in 2023. The truth is, every grit level needs to completely remove scratches before going to the next one. Take 400 grit pads for instance if applied too soon they leave behind noticeable grooves that require going back over the same area again. Sticking to the proper sequence pays off big time though, resolving around 95% of surface issues well before anyone even thinks about doing that final polish.
Confusing Grinding with Polishing: How Objective Confusion Leads to Wrong Grit Use
Many contractors make the mistake of grabbing those coarse 30 to 60 grit pads when they should be grinding instead of polishing. This leads to those annoying permanent scratches that nobody wants to see. Let's break it down: grinding removes quite a bit of material, usually around half a millimeter to one full millimeter. Polishing works differently though, focusing only on refining the very top layer, maybe somewhere between 0.05 and 0.2 mm thick. When contractors notice their pads wearing out way too fast, it often means they've been using 200 grit tools for leveling jobs. But wait! That kind of work actually needs something much coarser like those metal bonded 40 grit abrasives. According to some industry folks at the Concrete Polishing Association back in 2023, getting this right about matching grit types with what needs to be done can stop roughly three quarters of all surface problems before they even start.
Industry Paradox: Speed vs. Long-Term Finish Integrity
When contractors feel pressured to speed things up on flooring projects, they tend to skip grit steps along the way. But field tests indicate this rushing actually cuts floor life expectancy down by around 40 percent. The proper grinding sequence goes something like 30 then 50, followed by 100, 200, 400, 800, 1500 and finally 3000 grit. This thorough process creates those tough, resin infused surfaces we all want. Skip steps though, going straight from 50 to 200 then 800 and 3000? That leaves tiny cracks in the surface which just invite stains later on. For best results, most experienced installers spend roughly two thirds of their time working through the lower grit ranges (30 to 400) before spending the remaining third on fine polishing above 800 grit. Floors treated this way typically keep their shine for eight years or more without major touch ups.
Frequently Asked Questions
What is the purpose of using different grit sizes in concrete polishing?
The use of different grit sizes serves to progressively refine the concrete surface from coarse to fine, achieving optimal luster and surface integrity without excessive scratching.
How does grit size affect the final finish of polished concrete?
Grit size impacts the depth and visibility of scratches; finer grits remove finer scratches, resulting in higher gloss and clarity.
Why shouldn't I skip grit stages during the polishing process?
Skipping grit stages results in incomplete scratch removal, leaving surface imperfections that diminish finish quality.
How does skipping grit stages affect the durability of polished concrete?
Skipping stages often leads to micro-cracks and reduced gloss retention, impacting long-term durability and aesthetic appeal.
What is the ideal grit progression for achieving a high-gloss finish?
Typically, starting with coarse (30-100 grit) and moving through finer grits, culminating in extra fine (3000+ grit) is essential for achieving a high-gloss finish.
Table of Contents
- Understanding Diamond Grit Size and Its Impact on Concrete Polishing
- The Progressive Grit Sequence in Concrete Floor Polishing
- Matching Grit Size to Surface Condition and Preparation Needs
- Aligning Grit Selection with Polishing Goals and Finish Requirements
- Avoiding Common Mistakes in Diamond Polishing Pad Grit Selection
-
Frequently Asked Questions
- What is the purpose of using different grit sizes in concrete polishing?
- How does grit size affect the final finish of polished concrete?
- Why shouldn't I skip grit stages during the polishing process?
- How does skipping grit stages affect the durability of polished concrete?
- What is the ideal grit progression for achieving a high-gloss finish?